
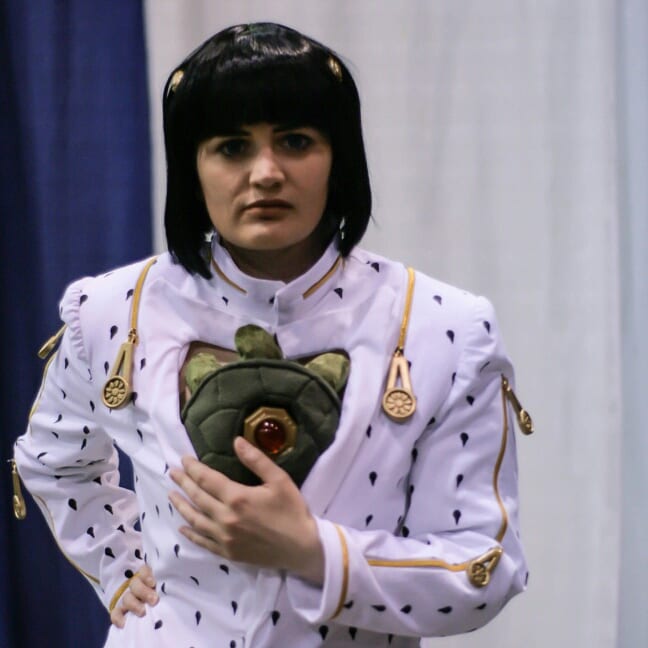
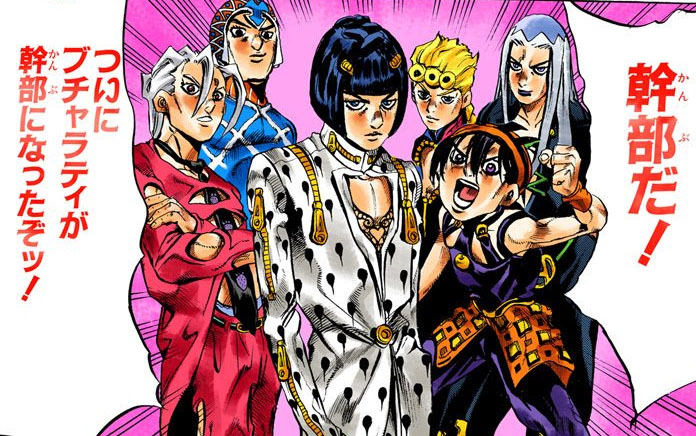
 Bruno Buccellati - Jojo's Bizarre Adventure - Golden Wind
Andy 


Made In: 2019
Status: active
Notes
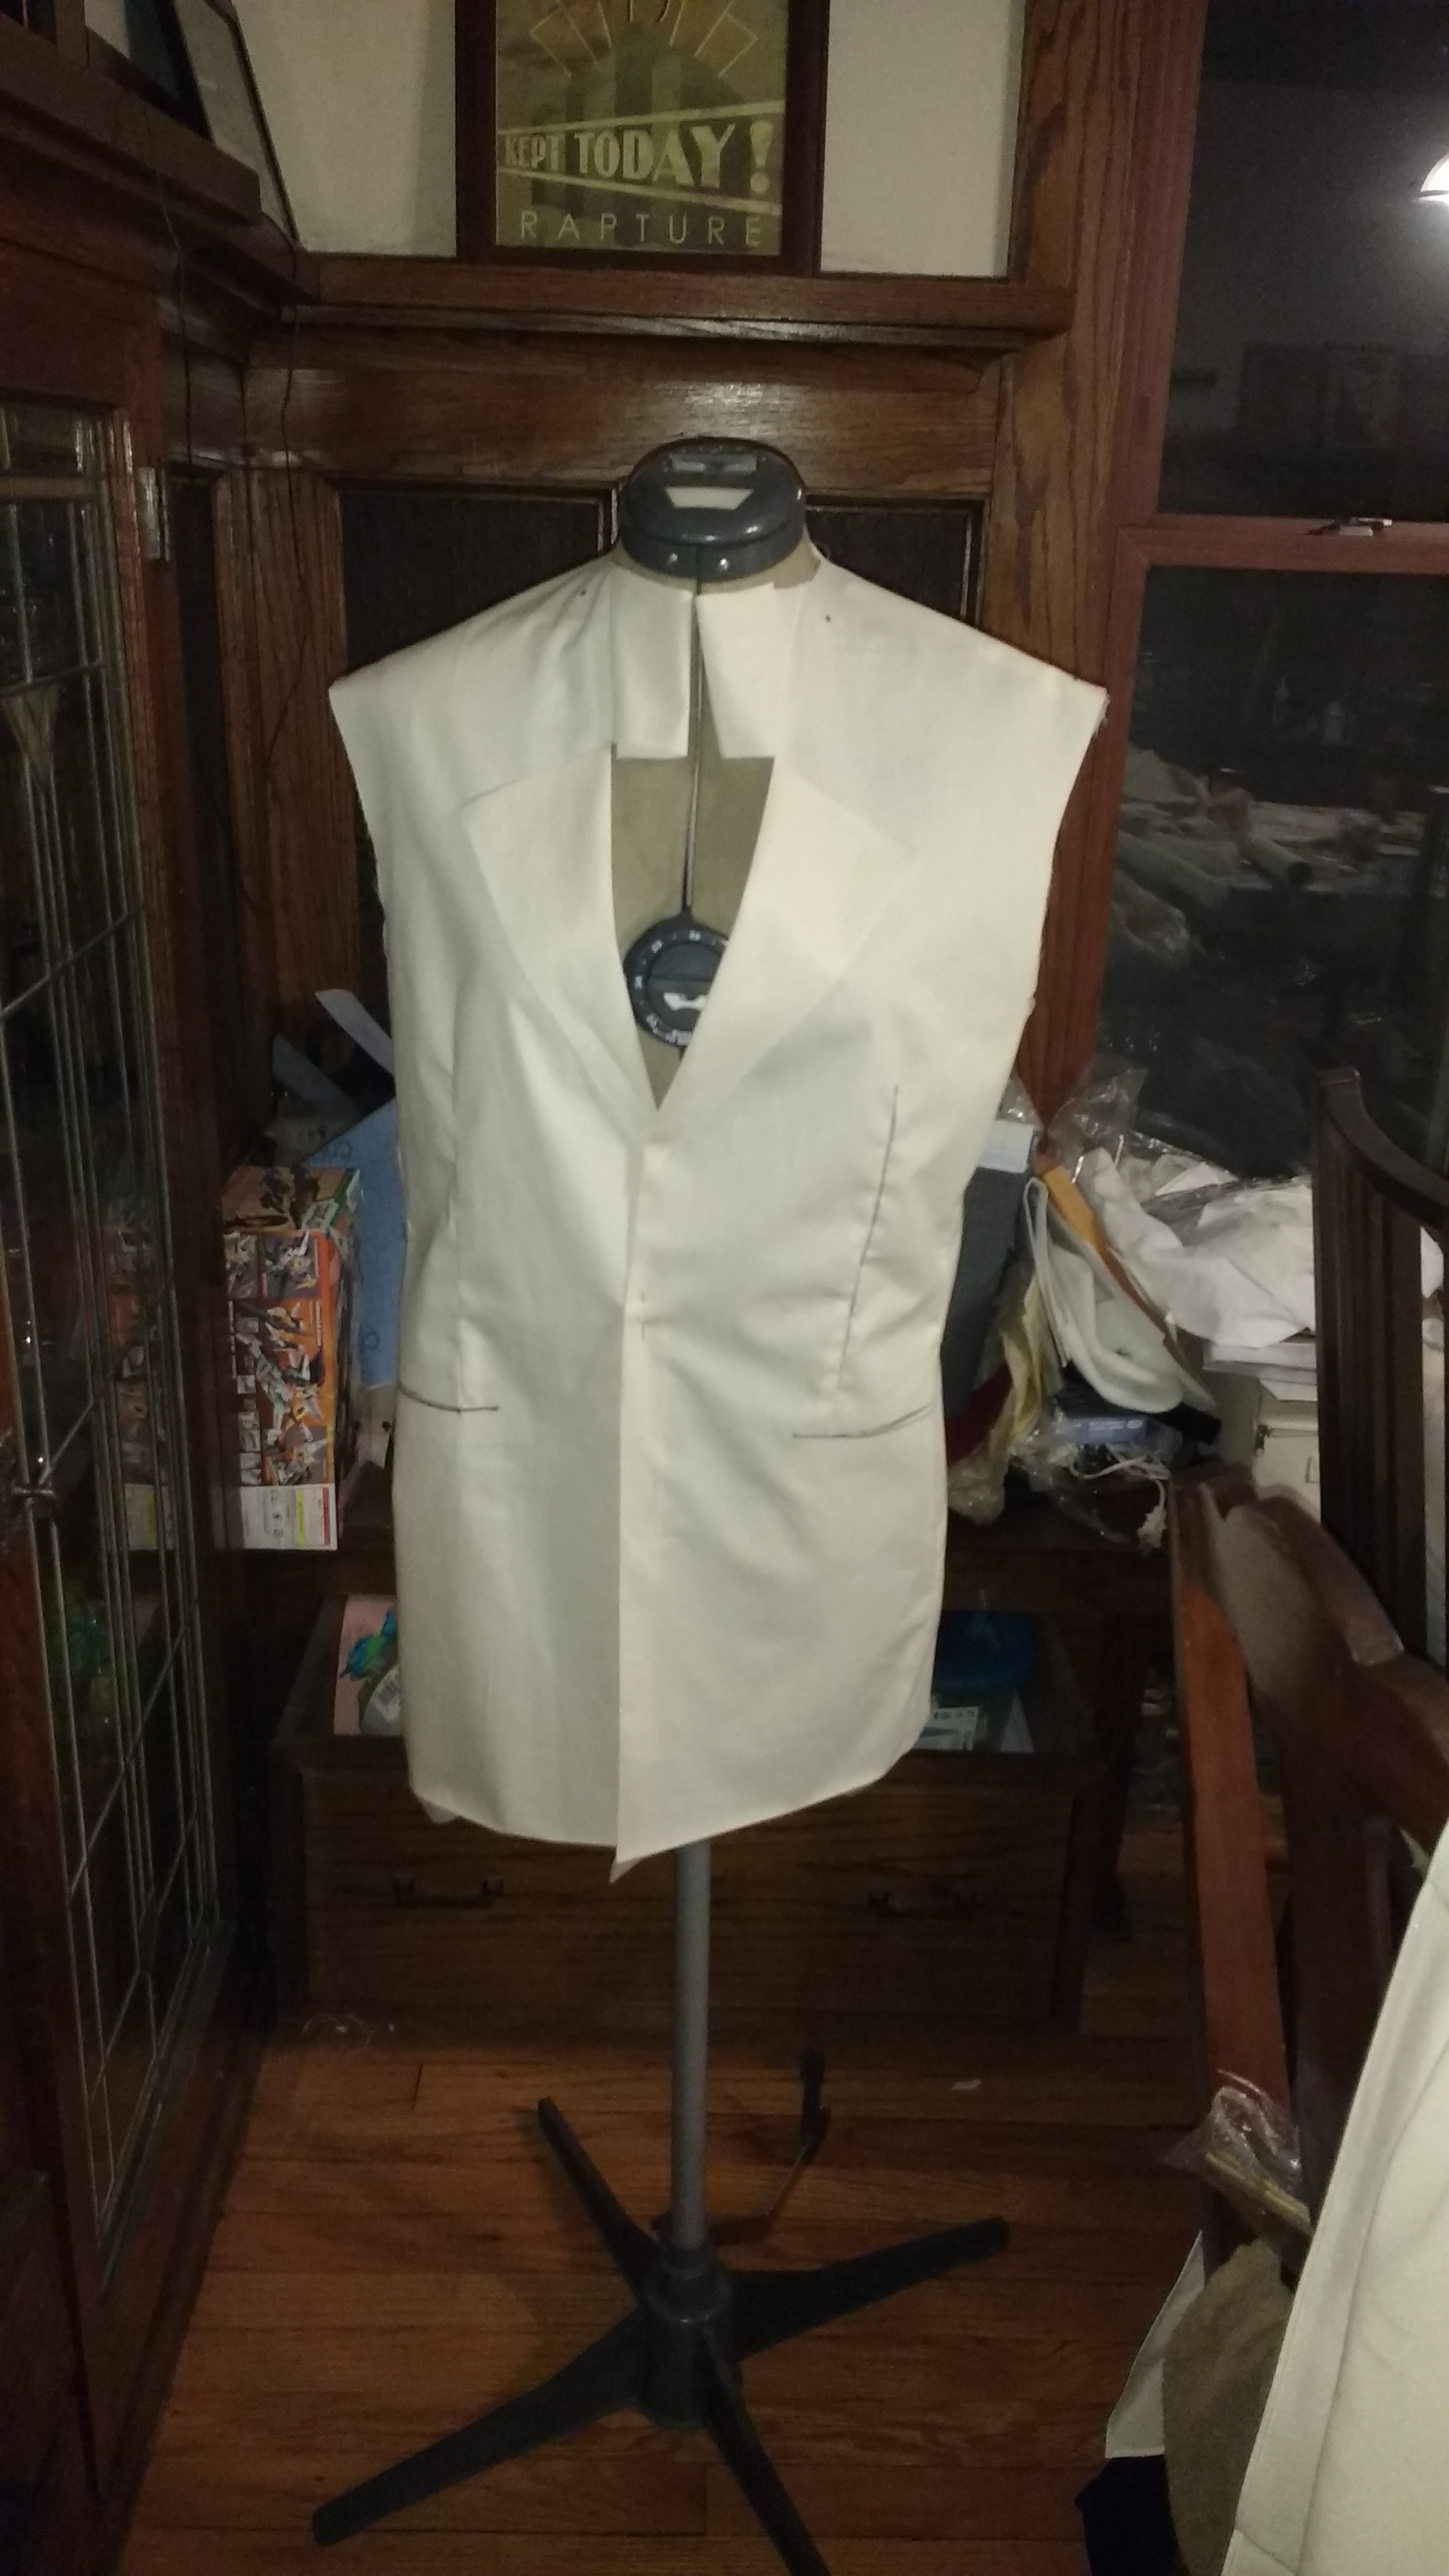
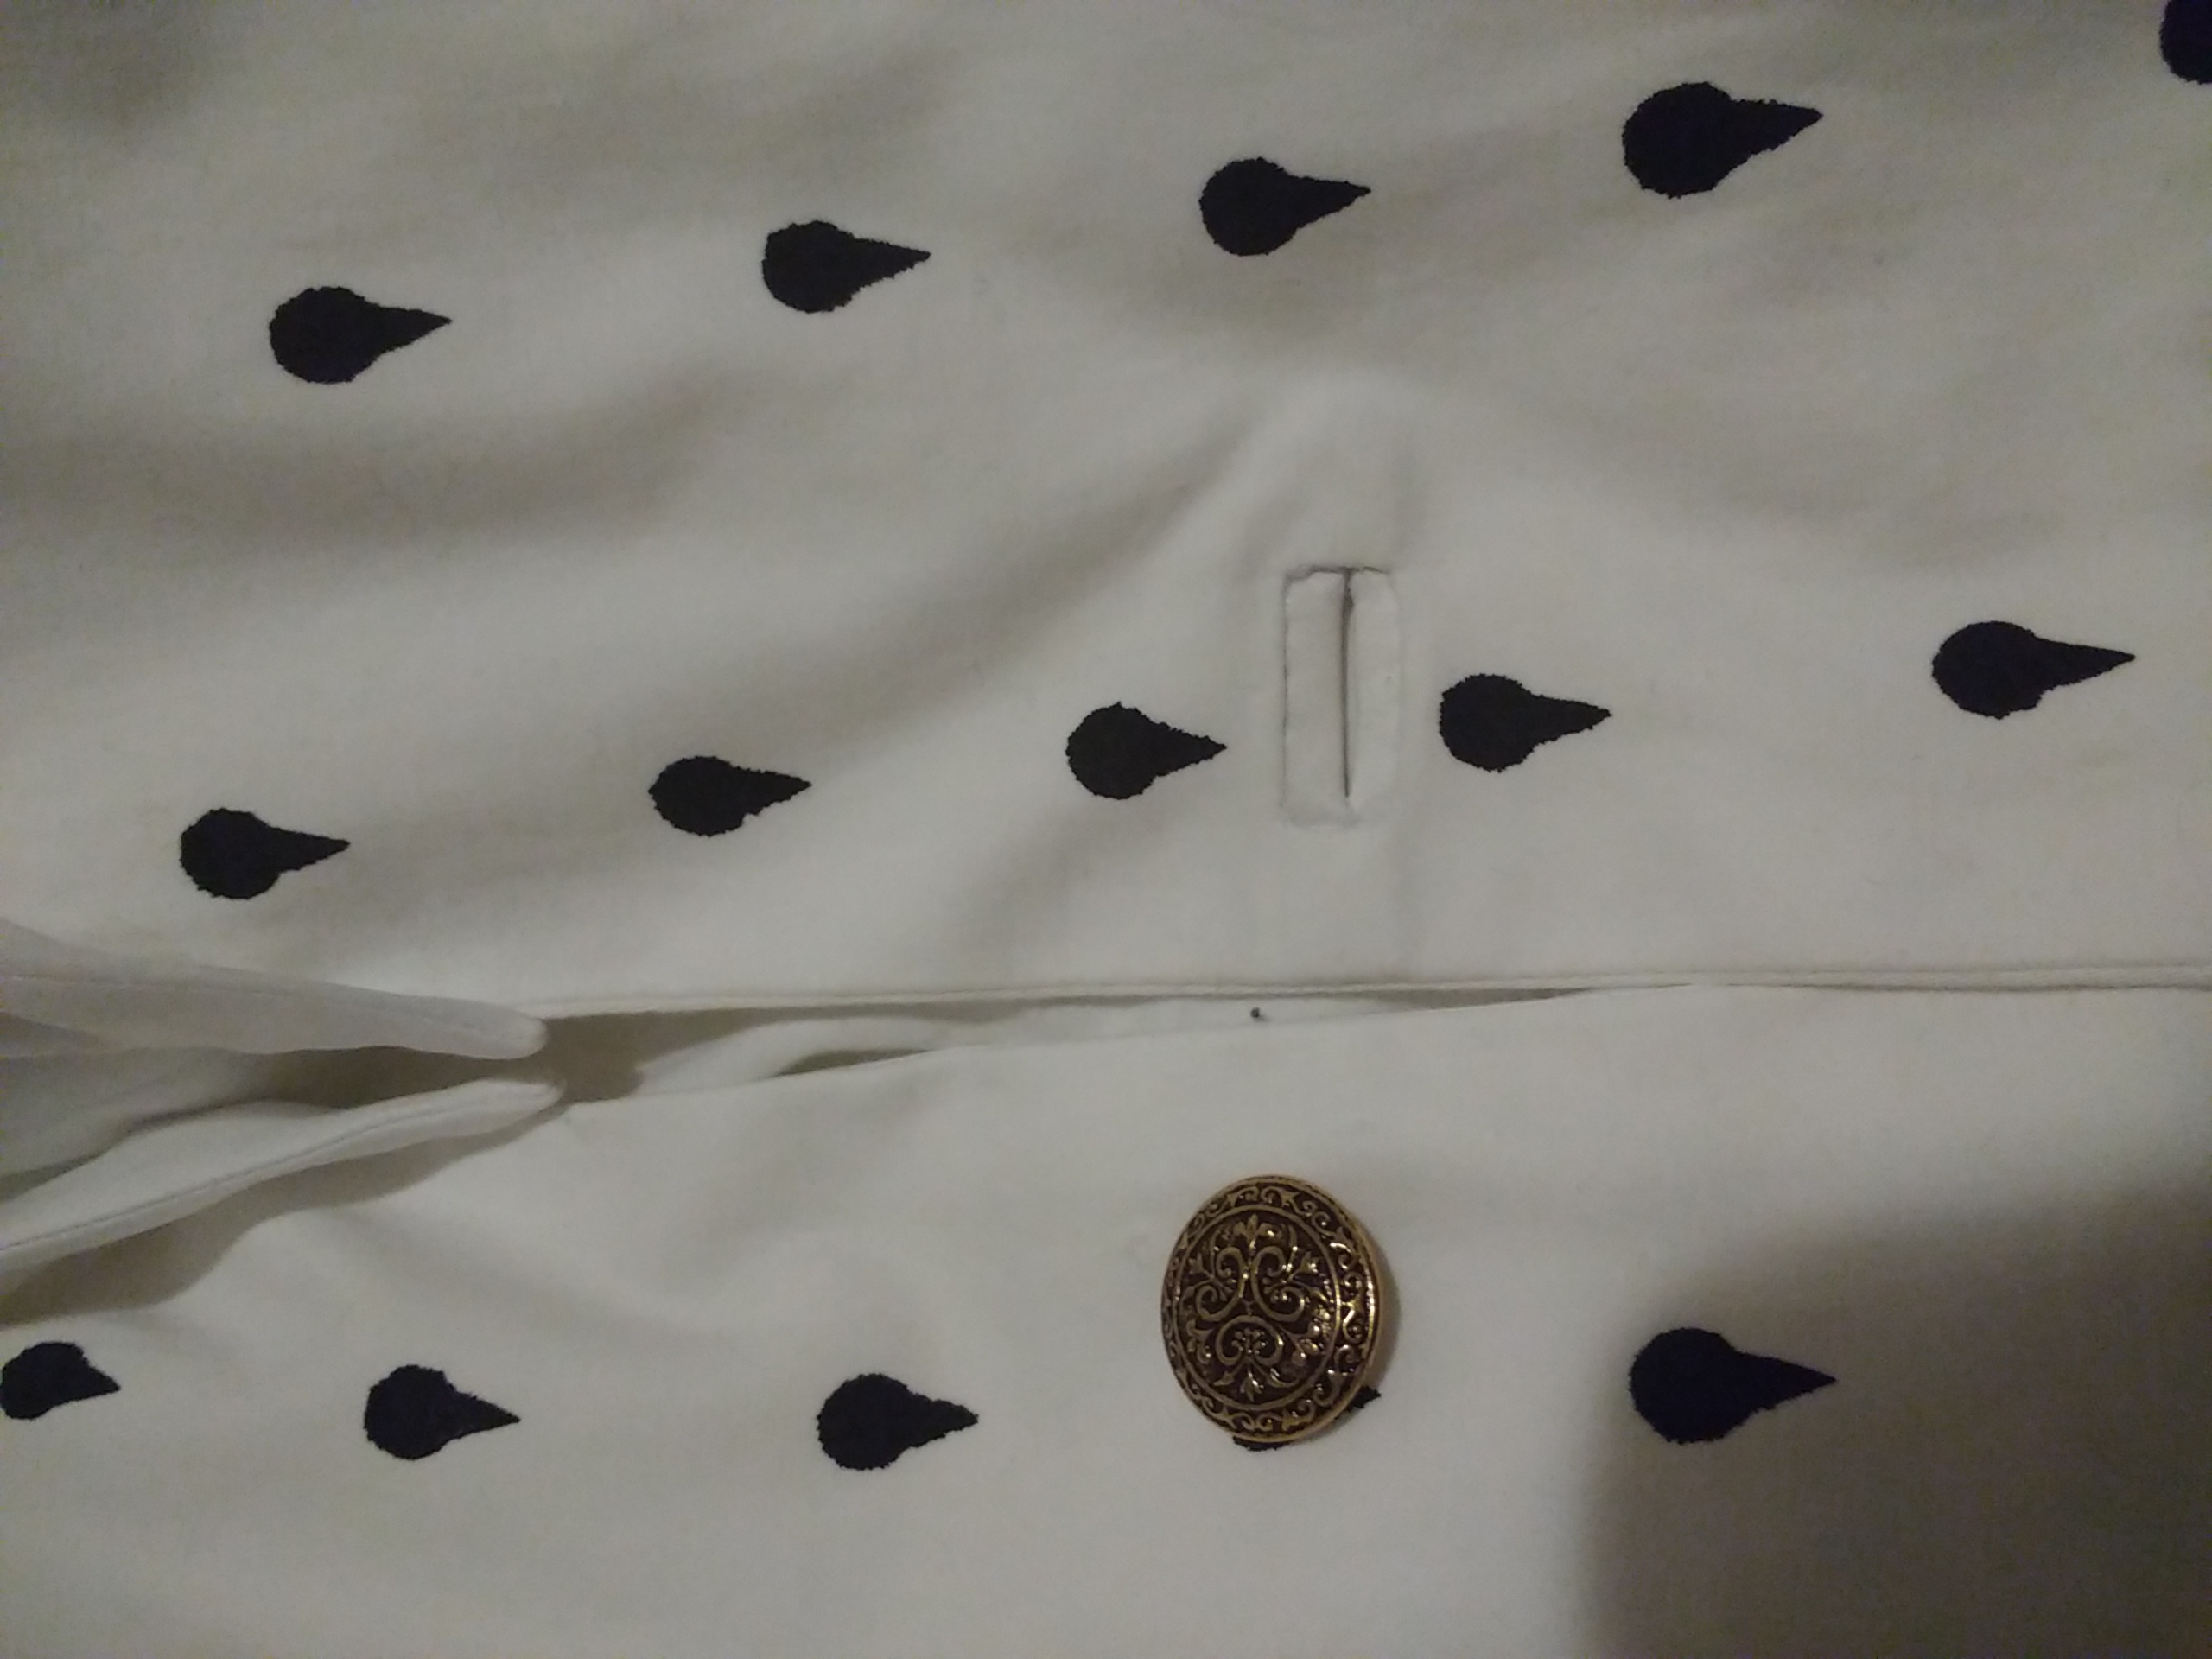
I've made a lot of jackets before, but never a whole suit. So why not tackle one that requires a custom all-over print, a very unique lapel situation, and six zippers with custom pulls? Go big or go home, right? I actually ended up redoing a few things on this outfit after the initial wear--I replaced the lapels with ones made of a matte satin which has a better contrast, and put a bound button hole into it to better close the front. I also took in the front edge along the collar to make that a better fit. I used Burda Style pattern #6871, which is a men's suit pattern.Components
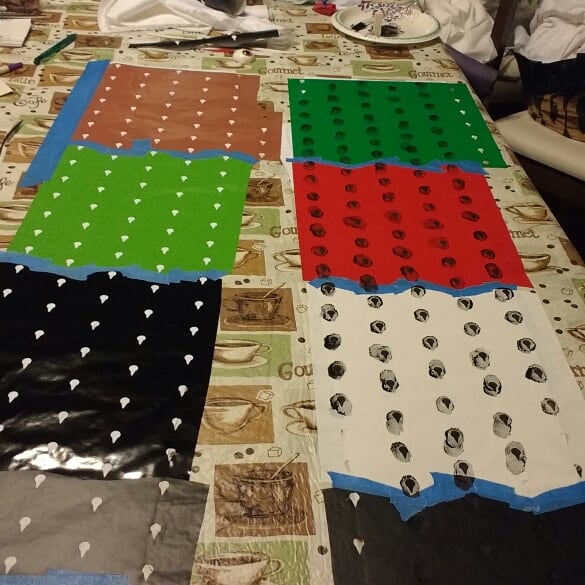
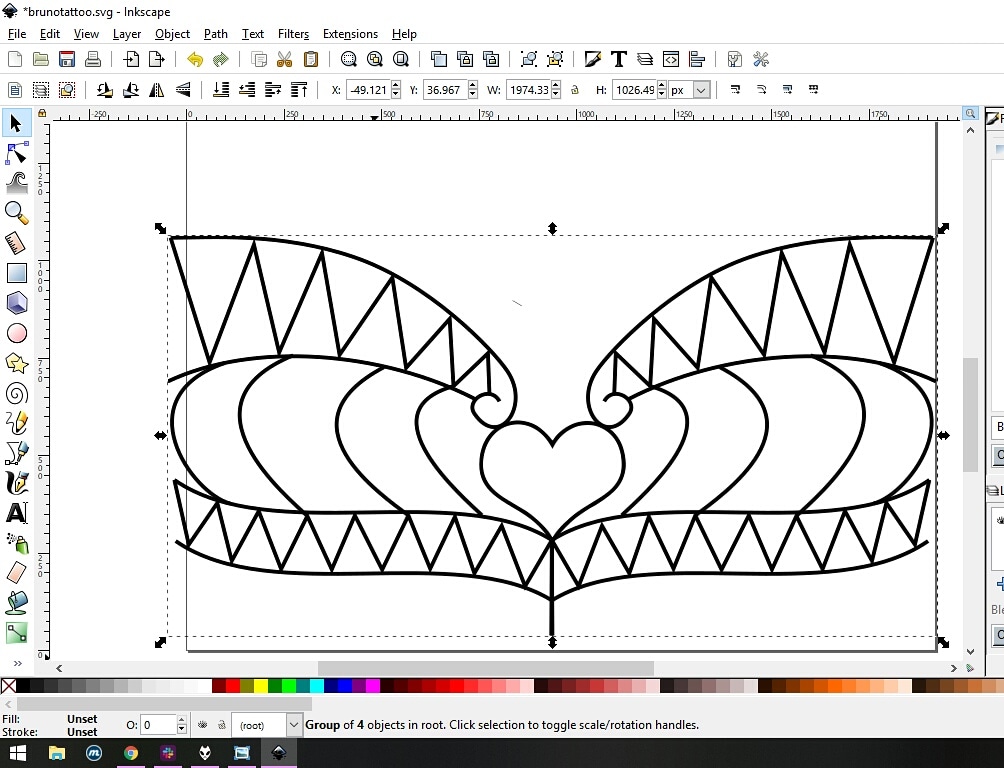
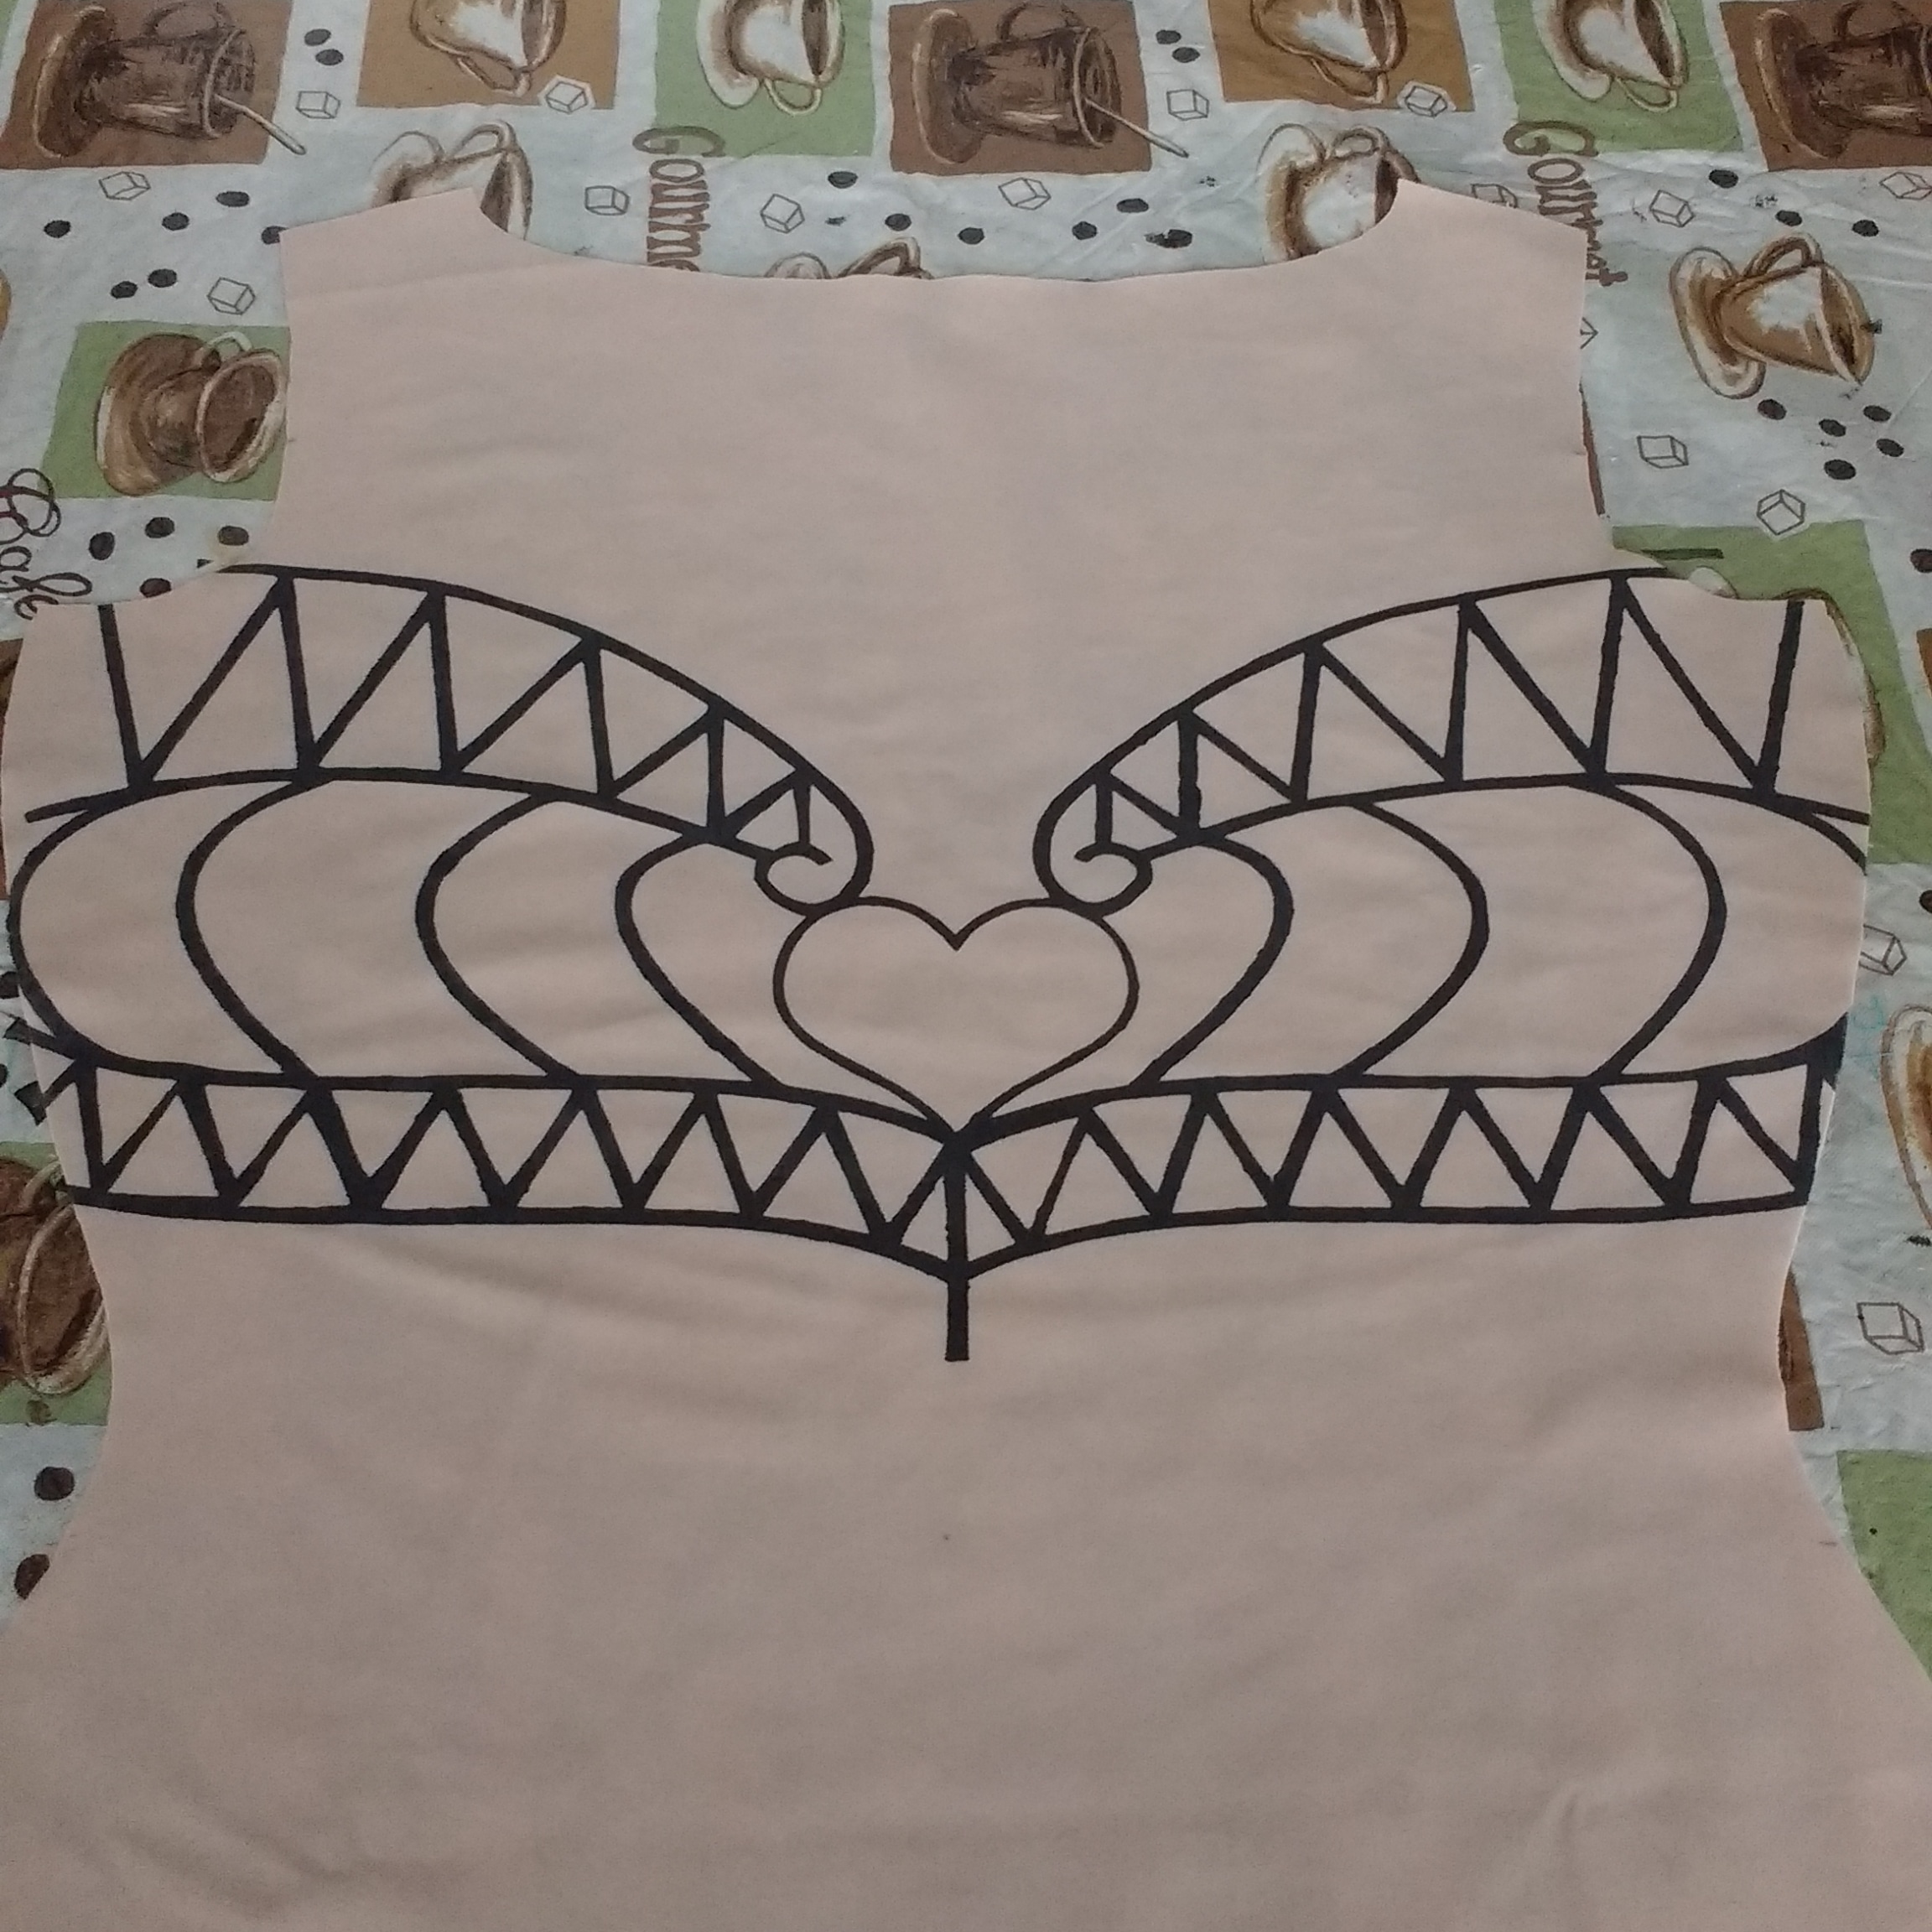
Fabric patterning
The fabric was all hand stenciled. The design was made in inkscape, carried over to Silhouette studio, and then arranged in a staggered design. I then cut about a million sheets of vinyl. The vinyl was then weeded and transferred over to the pre-cut pattern pieces. Pre-cutting the fabric was both a time-saver in terms of how much stenciling needed to be done, and a means of making sure I could line up the rows as precisely as possible on both suit coat and the slacks. The pants especially needed the rows to run straight down the length of the front. The stenciling was done using Jacquard Textile Colors and a makeup sponge as an applicator. The advantage of this paint is that it's opaque, thick enough to prevent most bleed under on the stencils, in addition to being permanent and washable. I used it previously on my Tales of the Abyss cosplay, and it's just. Very good paint. Definitely recommend.Pants
The pants were constructed following the Burda #6871 pattern, and are probably the best fitting pants I've ever made. I only had to make slight adjustments to the waist, taking them in slightly at the center back and sides, and tapering the leg slightly to better suit the design of the costume. The front pocket instructions were *slightly* challenging, but nothing that going through and making a mock-up couldn't clarify. This is an 'advanced' pattern, so I wouldn't recommend it to someone new to sewing.Jacket
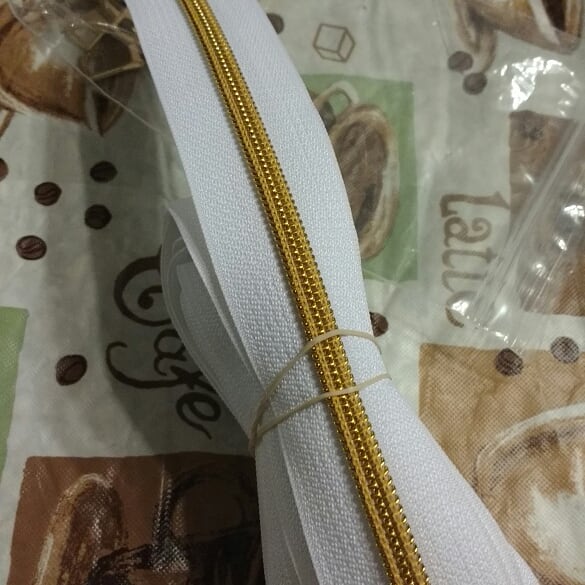
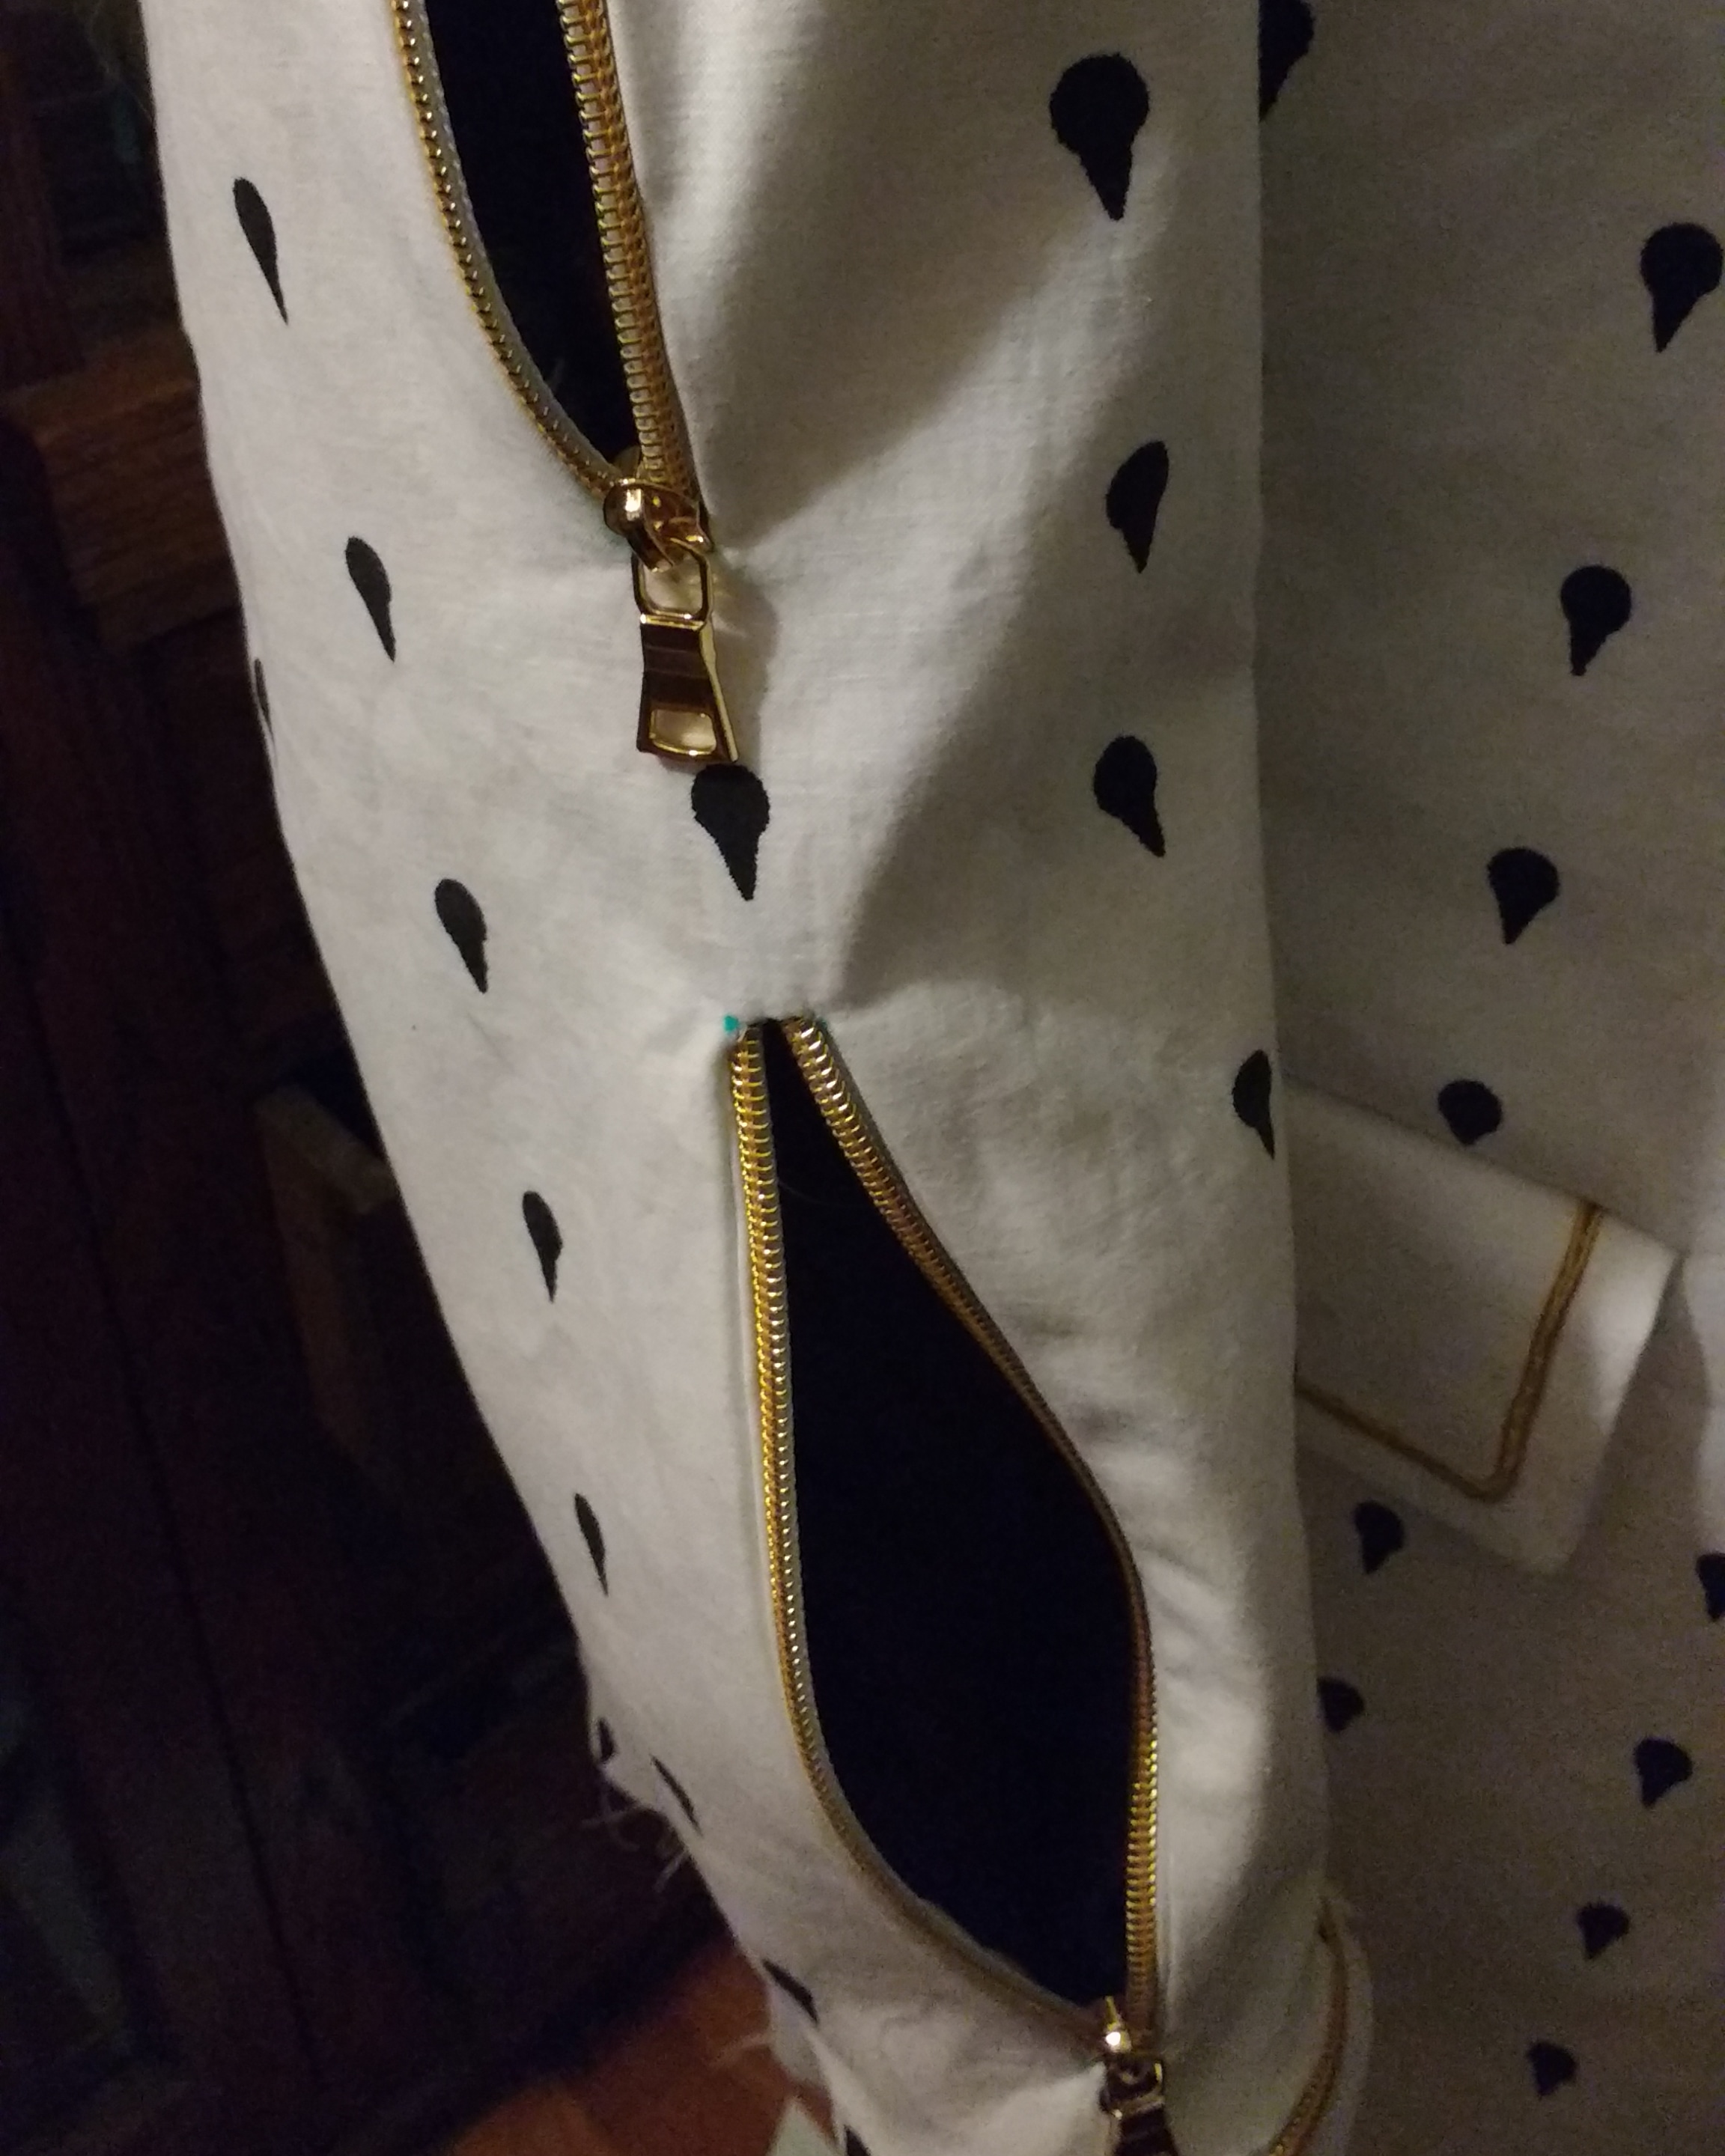
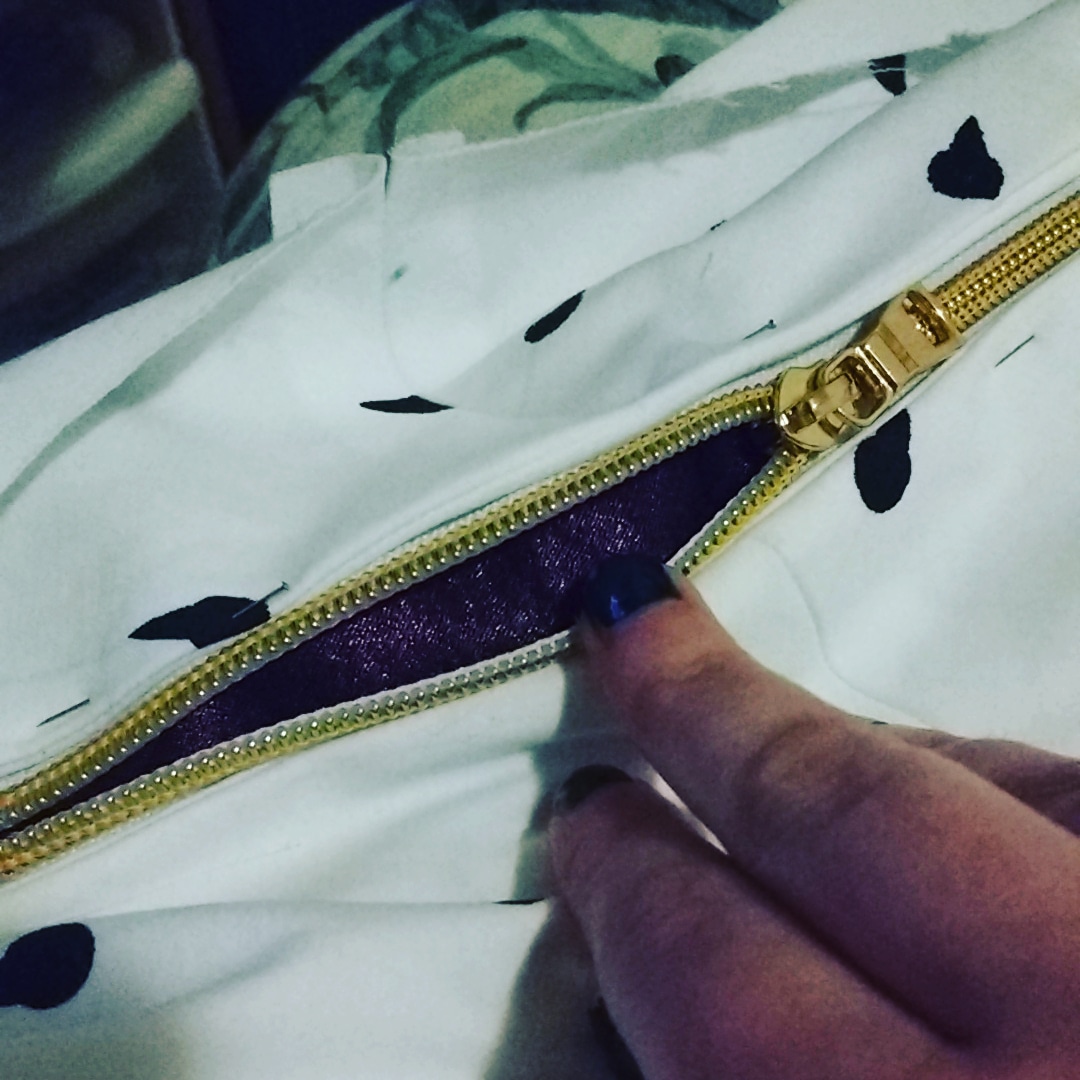
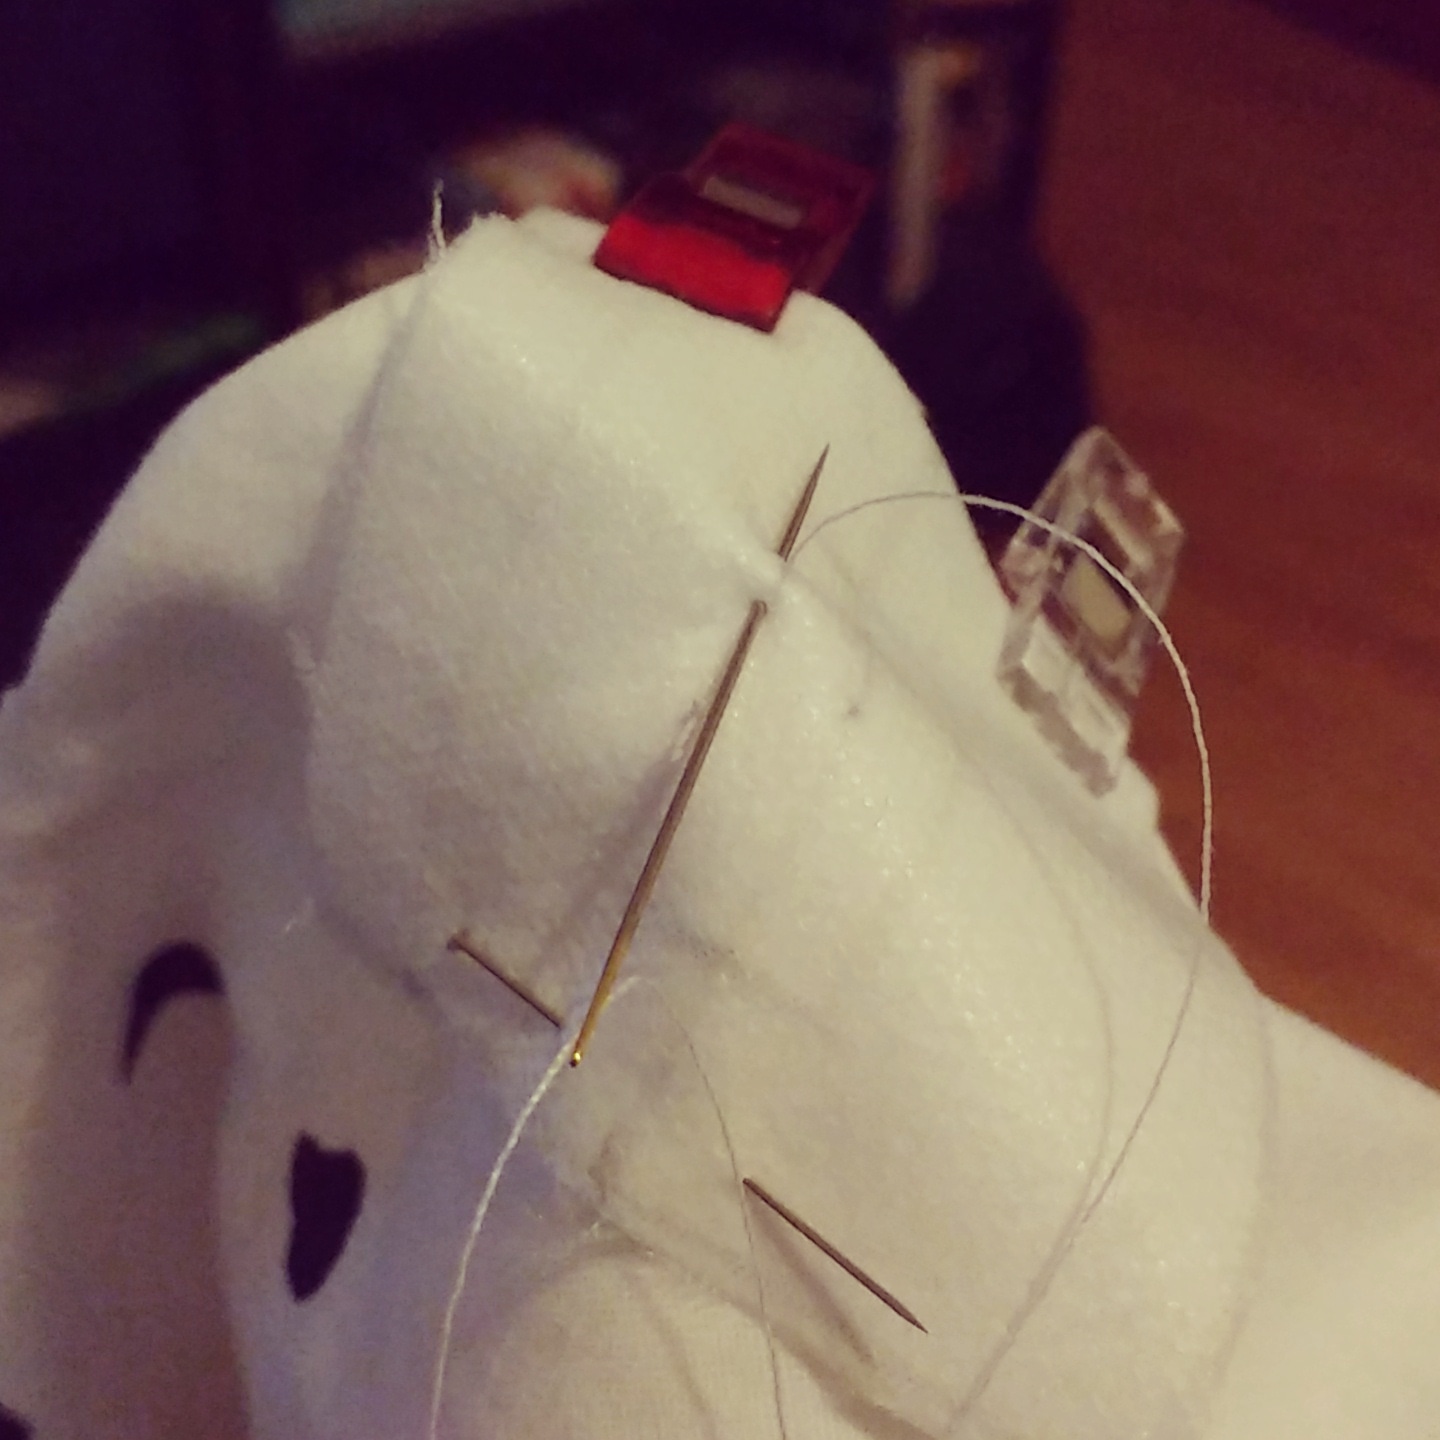
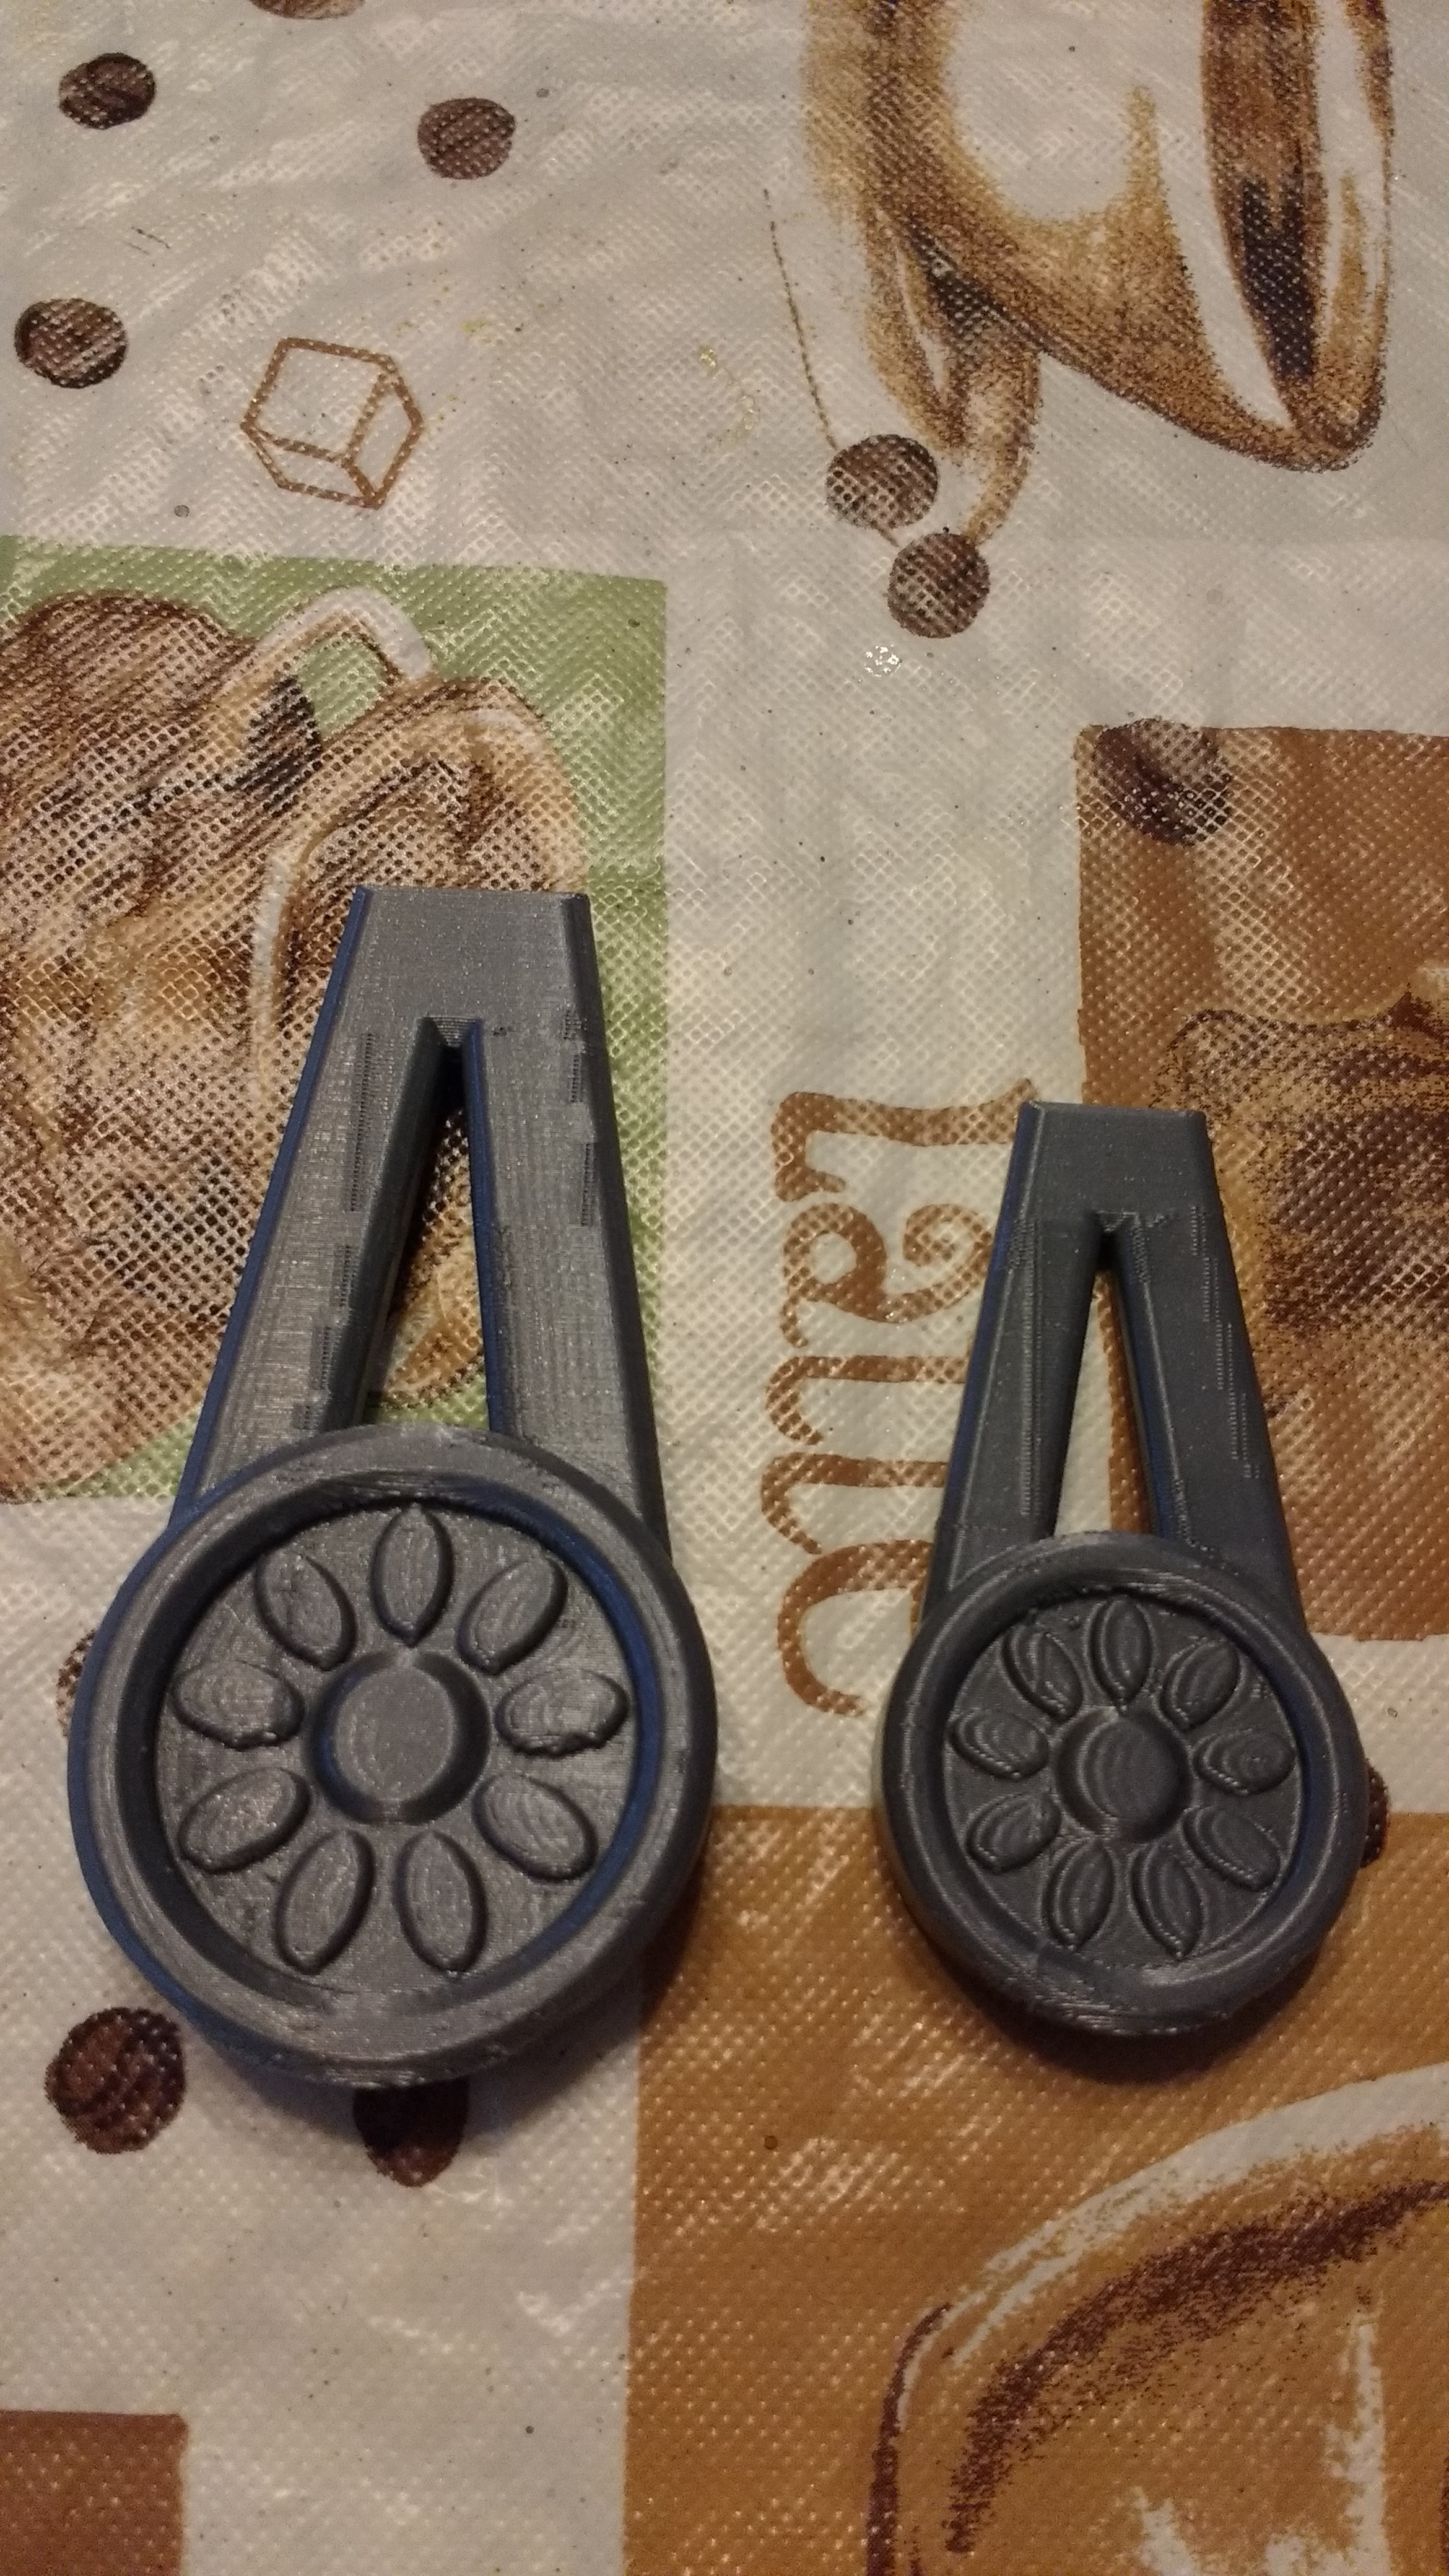
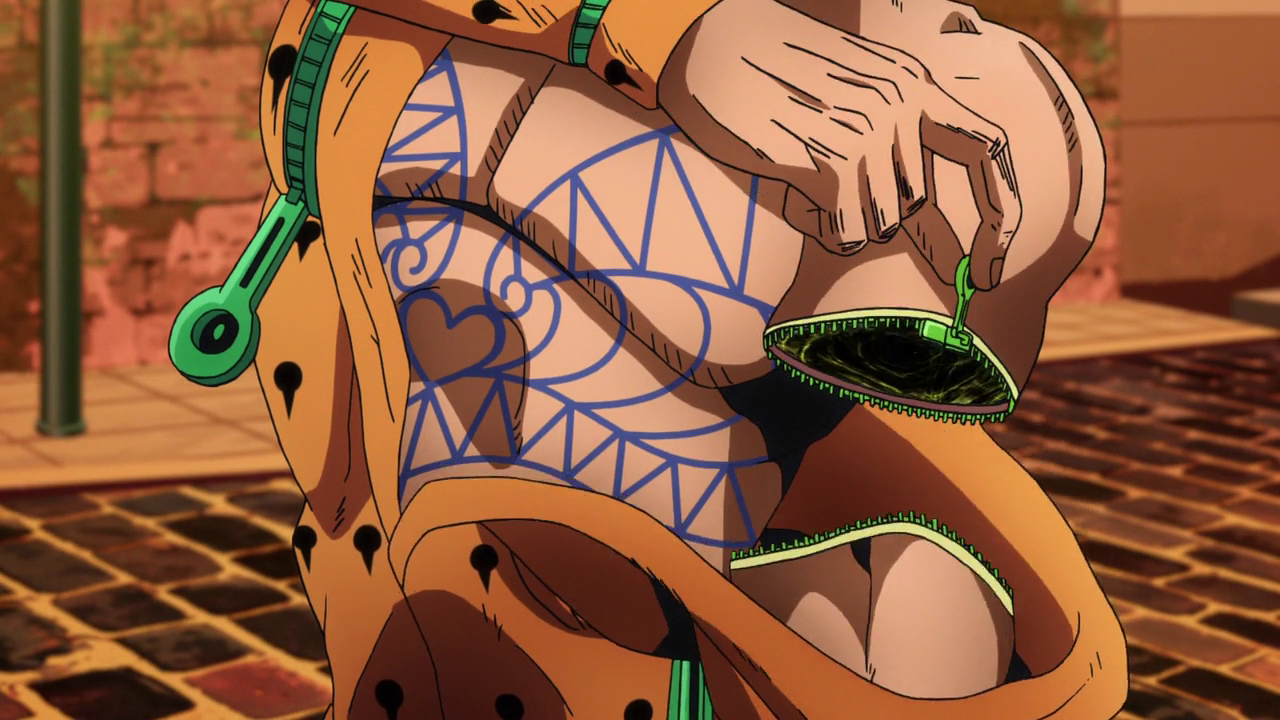
I made a mockup, then made the alterations necessary to get the mandarin collar and open front configuration. I also altered the side panels to flare out more over the hips, since all of Araki's designs tend to have that nipped in waist and hip flare silhouette. I also marked out where the zippers needed to be installed over the shoulders and in the sleeves. The jacket is self-lined, and the detail on the pockets is gold soutache left over from a previous costume. The sleeves had to be taken in somewhat, tapering towards the wrist.All of the zippers on this jacket are functional. That was one of the big things I wanted to accomplish going into this project--yeah, you can buy pretty good versions of this costume pre-made, but do they let you hide a multitude of weird props to surprise people with? No. Sticky Fingers' zippers are such an integral part of Bruno that I wanted to integrate it somehow, and really, if I'm going to install all these zippers anyway, doesn't it just make sense that they do something? The shoulder zippers simply have some of the purple pocket fabric (a remnant from JoAnn's of undetermined origin, I just had it laying around because I hoard fabric) and don't really do more than unzip to show off that lining. The sleeve zippers, however, all have pocket bags made of the purple fabric, and can accommodate a reasonable amount of stuff without looking distorted. I've kept cosplay business cards and money in them, as well as some Halloween prop severed fingers and a plastic eyeball in mine. It's like a magic trick. I love getting to surprise people with it. The zippers themselves came from the wonderful people at thezipperlady.com. Not only did they have the exact color combination I needed in multiple yard lengths, they have amazing customer service. Seriously, they were amazing. I'm definitely ordering from them again in the future. I 3d modeled and printed the zipper pulls myself, finished one in each size, and then gave them to Cocoa, who graciously did the molding, casting, and painting on them so that I didn't have to sand and finish six separate 3d prints while also trying to do the rest of this costume. For anyone interested, I have the 3d file for these up on Thingiverse: www.thingiverse.com/AndyInk/designs